
I was sitting at my workbench last Tuesday, trying to calibrate the oscillators on an old Moog synth, when that rhythmic drip… drip… drip… from the kitchen sink started driving me up the wall. It wasn’t just the noise; it was the inefficiency of it all. Most people think they need to call out an expensive plumber or buy a massive, overpriced toolkit just to stop a minor nuisance, but that’s a load of nonsense. Learning how to fix a leaky faucet isn’t some complex engineering feat that requires a degree; it’s usually just a matter of identifying one worn-out part and swapping it out.
I’m not here to sell you on some complicated “smart home” plumbing solution that requires an app and a subscription. My goal is to give you the straightforward, manual approach to getting your house back in order. In this guide, I’m going to walk you through the exact steps to diagnose the leak and the most efficient way to repair it using basic tools you likely already have in your junk drawer. We’re going to cut through the jargon and focus on what actually works so you can stop wasting water and start enjoying the silence.
Table of Contents
Guide Overview
Tools & Supplies
- Adjustable wrench for loosening nuts
- Screwdriver (Phillips or flathead) for removing handles
- Allen wrench for removing set screws
- Replacement washers or O-rings (depending on faucet type)
- Plumber's grease (small tube)
- Thread seal tape (one roll)
Step-by-Step Instructions
- 1. First things first, you need to shut off the water. Don’t just turn the handle and hope for the best; find the shut-off valves under the sink and turn them clockwise until they stop. If your shut-off valves are old and won’t budge, you’ll need to kill the main water supply to the whole house. Once that’s done, open the faucet to drain any remaining pressure and water left in the lines.
- 2. Now, get your workspace ready. I always keep a small towel or a rag handy to plug the drain. There is nothing more frustrating than dropping a tiny screw or a washer down the sink and realizing you’ve just turned a simple fix into a plumbing nightmare. Grab your screwdriver and a wrench, and lay them out so you aren’t hunting for them mid-job.
- 3. You’ve got to get to the guts of the thing. Most faucets have a decorative cap on top of the handle—usually marked ‘H’ or ‘C’. Pop that off with a flathead screwdriver to reveal the screw underneath. Once you unscrew it and pull the handle off, you’ll see the valve stem or cartridge. This is the part that actually controls the water flow, and it’s almost certainly where your problem lies.
- 4. Take a close look at the hardware you just pulled out. In most cases, a leak is caused by a worn-out rubber washer or an O-ring that has become brittle over time. If you see a cracked piece of plastic or a corroded metal part, don’t try to glue it back together. Just take the old part with you to the hardware store so you can match it exactly.
- 5. Once you have the new parts in hand, clean out any mineral buildup or grit from inside the faucet body using a bit of white vinegar and an old toothbrush. A clean surface is essential for a tight seal. If there’s gunk in there, even a brand-new washer won’t do its job properly, and you’ll be right back where you started.
- 6. Reassemble everything in the reverse order you took it apart. Seat the new washer or cartridge firmly into place, screw the stem back in, and pop the handle back on. Don’t over-tighten the screws; you want them snug, but you don’t want to strip the threads or crack the housing.
- 7. Finally, it’s time for the moment of truth. Turn your water supply valves back on slowly. Don’t just blast it open; gradual pressure prevents sudden jolts in the pipes. Check the faucet for leaks, turn it on and off a few times to clear any air from the lines, and if that drip is gone, you’re officially done.
The Essential Plumbing Tools for Faucet Repair You Actually Need
Look, you don’t need to go out and buy a massive, professional-grade toolkit just to stop water drip at sink. Most of those big retail kits are filled with specialized gadgets you’ll use exactly once before they collect dust in your garage. For a standard repair, you really only need the basics: a good adjustable wrench, a set of screwdrivers (both Phillips and flathead), and perhaps some needle-nose pliers. If you’re dealing with a more modern setup, you might need to dive into some cartridge faucet troubleshooting, which usually just means having a hex key or Allen wrench on hand to loosen the handle.
I always tell my clients to keep a small, organized bin of common consumables so they aren’t running to the hardware store mid-job. Instead of hunting for a specific, expensive brand-name part, just make sure you have a variety of rubber washers and O-rings. Sometimes, the simplest fix is just going to replace faucet washer components that have worn down from years of friction. Keep it simple, keep it functional, and don’t let the sheer number of options at the store intimidate you.
Stop the Water Drip at the Sink Without the Stress
Look, the biggest mistake I see people make isn’t a lack of tools; it’s a lack of patience. They rush through the process, force a screw that isn’t turning, and end up stripping the hardware. If you’re dealing with a modern setup, you’ll likely find yourself into cartridge faucet troubleshooting rather than just swapping out a simple rubber ring. These units are a bit more finicky, so don’t try to manhandle them. If the cartridge feels stuck, it’s usually just mineral buildup. A little bit of white vinegar and some steady, even pressure will do more than brute force ever will.
Another thing—if you’ve already swapped the parts and it’s still weeping, don’t immediately assume you need a whole new fixture. Sometimes you just need to tighten a loose faucet spout or check the O-rings for a clean seat. I’ve spent many late nights at my workbench realizing that a “broken” system is often just a system that needs a bit of fine-tuning. Take a breath, check your connections, and make sure everything is seated properly before you call it a day.
Five Pro-Tips to Keep the Drip from Coming Back
- Shut off the water supply before you touch a single screw. I’ve seen too many guys skip this step only to end up with a miniature indoor lake in their kitchen. Check under the sink and turn those valves clockwise until they stop.
- Don’t go buying the most expensive replacement kit at the big-box store right away. Most of the time, you just need a specific size of rubber washer or an O-ring. Take the old, broken part with you to the hardware store so you actually get the right match.
- Clean out the mineral buildup while you’ve got the faucet apart. If you see crusty white stuff on the components, soak them in a bit of white vinegar. If you don’t clear that out, the new parts won’t seat properly, and you’ll be right back where you started.
- Watch your torque. When you’re putting things back together, don’t crank down on the bolts like you’re trying to win a wrestling match. Over-tightening is the fastest way to crack a plastic housing or strip a thread. Tighten it until it’s snug, then give it just a tiny nudge more.
- Test the system slowly. Once the repair is done, don’t just blast the water on full blast. Turn the supply valves back on gradually and watch for any signs of moisture. It’s better to catch a small leak now than to find a puddle an hour later.
The Bottom Line
Don’t go overboard with tool shopping; a solid wrench, a screwdriver, and a fresh washer are usually all you need to get the job done.
Identify the specific type of faucet you have before you start tearing things apart so you don’t end up with a pile of parts you can’t use.
Focus on the source of the leak rather than chasing symptoms—fixing the internal seal is a permanent solution, whereas just tightening the handle is a temporary band-aid.
Cutting the Noise and Closing the Tap
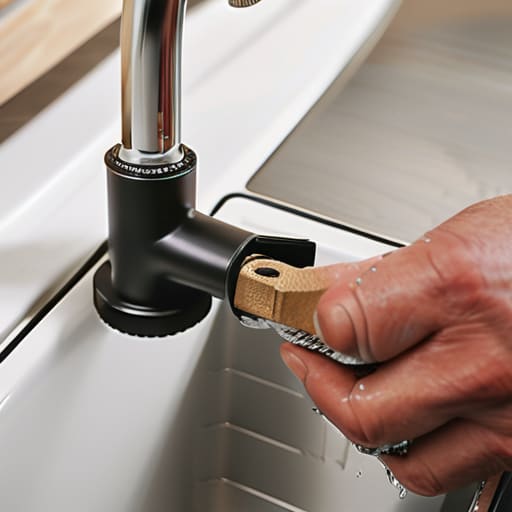
At the end of the day, fixing a leaky faucet isn’t about mastering complex plumbing theory; it’s about having the right tools and the patience to follow through. We’ve covered the essentials—from identifying whether you’re dealing with a worn-out washer or a faulty cartridge to making sure you have that single wrench ready to go. You don’t need a garage full of specialized equipment or a degree in civil engineering to solve this. Just keep your workspace organized, don’t force the parts if they aren’t turning, and remember that simplicity is your best friend when you’re working with physical hardware. Once you’ve swapped that part out and tightened the connection, you’ve successfully bridged the gap between a nagging problem and a functional solution.
There is a specific kind of satisfaction that comes from fixing something with your own two hands. In a world where we spend most of our time clicking buttons and managing digital abstractions, there’s something grounding about the tactile reality of a job well done. You’ve saved money, you’ve saved water, and you’ve reclaimed a bit of your own autonomy. Don’t let these small repairs intimidate you; they are just systems waiting to be understood. Once you master the drip, you’ll find you have the confidence to tackle the next project that comes your way. Keep it simple, keep it steady, and get back to living.
