
I was staring at a crooked landscape print for twenty minutes last Tuesday, gripped by that familiar, low-grade frustration of seeing something just slightly off in my living room. Most people think they need a specialized laser level or some expensive, proprietary mounting kit from a big-box store to get it right, but that’s just more clutter in your junk drawer. The truth is, knowing how to hang a picture shouldn’t require a degree in structural engineering or a massive hardware budget; it just requires understanding how your walls actually work. I’ve spent years fixing complex systems, but I’ve learned that the most elegant solutions are usually the ones that involve the least amount of gear.
In this guide, I’m cutting through the marketing fluff to give you the straight talk on getting your art on the wall and keeping it there. We aren’t going to overcomplicate this with unnecessary gadgets that end up in the trash by next year. Instead, I’ll show you how to select the right hardware for your specific wall type, how to find that perfect eye-level sweet spot, and how to avoid the dreaded “Swiss cheese” effect of too many holes. Let’s get your space looking right with tools you already own.
Table of Contents
Guide Overview
Tools & Supplies
- Hammer for driving nails or hooks
- Pencil for marking placement
- Tape measure for measuring distance
- Picture frame 1 unit
- Wall hanging hardware 1 pack
- Level to ensure straightness
Step-by-Step Instructions
- 1. First, clear your workspace and gather your gear. Don’t go halfway through the job only to realize you’re missing a screwdriver. You’ll need a hammer, a level (even a cheap one works), a pencil, a measuring tape, and the appropriate hardware for your wall type. If you’re dealing with drywall, grab some proper anchors; if it’s plaster or masonry, you’re going to need something more heavy-duty.
- 2. Measure the back of your frame to find the hanging point. Most people just eye it, but that’s how you end up with a crooked mess. Use your measuring tape to find the distance from the top of the frame to the actual wire or the sawtooth hanger on the back. Write this number down in your notebook so you don’t forget it once you’re standing on a ladder.
- 3. Decide where you want the center of the picture to sit. A common mistake is hanging everything too high—if you have to tilt your head back to see it, it’s too high. Aim for eye level, roughly 57 to 60 inches from the floor. Once you have your spot, use your pencil to mark a small dot where the top of the frame should be, then use your math to calculate the exact nail placement based on that measurement we took in step two.
- 4. Double-check your marks with a level. Even if you’re confident, a quick check ensures you aren’t fighting gravity later. If you’re hanging a heavy piece, this is the moment to decide if you need to drill a pilot hole for an anchor. Don’t skip this part; trying to force a heavy nail into drywall without support is a one-way ticket to a hole in your wall and a broken frame.
- 5. Drive the nail or anchor into your mark. If you’re using a hammer, keep your strikes firm and controlled—don’t go swinging like you’re trying to break up concrete. If you’re using a drill for an anchor, keep it perfectly perpendicular to the wall. If you go in at an angle, the hardware won’t seat correctly, and nothing will stay put.
- 6. Hang the frame and perform the final level check. Don’t just assume it’s straight because the nail is straight. Place your level on top of the frame and look for that little bubble. If it’s off, don’t panic and start pulling nails out; usually, a tiny adjustment to the wire or the hanging hardware is all it takes to get it dialed in.
- 7. Clean up the debris and step back. Once it’s straight, take your tools and get them back in the bag. A job isn’t finished until the workspace is as clean as the result. Now, take a second to actually look at it from across the room to make sure the visual balance feels right before you call it a day.
Measuring for Picture Frames Without the Headache
Most people start by driving a nail into the wall, and that’s usually where the headache begins. Before you even touch a tool, you need to stop guessing where the center is. I always grab my notebook and a pencil to sketch a quick layout on paper first. When it comes to eye level art placement, the golden rule is roughly 57 to 60 inches from the floor to the center of the piece. If you go higher, it looks like it’s floating away from the room; any lower, and you’re making people look at the floor.
Don’t just eyeball the alignment, either. I’ve seen too many DIY projects ruined by a slight tilt that drives you crazy every time you walk past. Grab a good spirit level to ensure your lines are dead straight. If you’re dealing with a rental or a delicate surface, don’t sweat the heavy-duty gear; just weigh your options between command strips vs nails based on the weight of the frame. It’s better to spend an extra two minutes measuring accurately now than spending an afternoon patching holes later.
Choosing Wall Mounting Hardware Types That Actually Hold
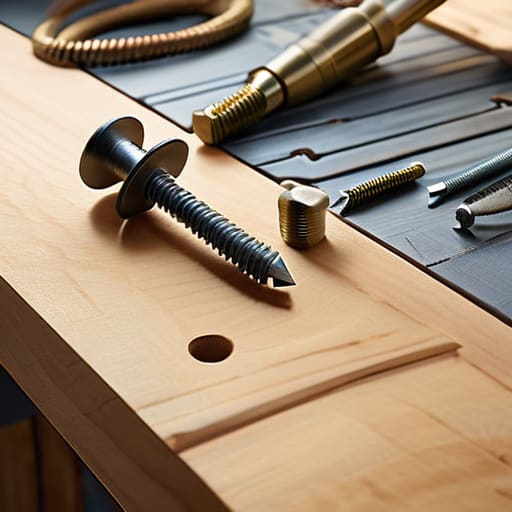
Look, don’t just grab the first thing you find in your junk drawer and hope for the best. Choosing between different wall mounting hardware types comes down to one thing: weight. If you’re hanging a lightweight print, a simple nail or a small screw will do the job just fine. But if you’re trying to mount a heavy, framed mirror or a thick piece of reclaimed wood art, a basic nail is going to fail, and you’ll end up with a hole in your drywall and a shattered frame. For those heavier pieces, you need to invest in something substantial, like a toggle bolt or a heavy-duty anchor that actually bites into the stud.
I get a lot of questions about command strips vs nails, especially from renters trying to keep their security deposits intact. Here’s my take: strips are great for small, light items, but they aren’t a magic bullet. If the surface isn’t perfectly clean or the weight is slightly off, they will fail. If you want a permanent, reliable solution that won’t leave you staring at a pile of debris on the floor, stick to the hardware that’s built to stay put.
Five Pro-Tips to Keep Your Walls from Looking Like a Mess
- Stop eye-balling it. Use a pencil to mark your spot, but don’t commit until you’ve stepped back five feet. Your eyes play tricks on you when you’re standing two inches from the drywall.
- Respect the weight. If that frame is heavy enough to make your wrists ache, don’t trust a flimsy nail. Use a proper screw and an anchor; it’s better to spend two minutes doing it right than two hours patching a hole.
- The “Center Line” Rule. A common mistake is hanging everything too high. Aim for the center of the picture to be about 57 to 60 inches from the floor. That’s standard gallery height, and it keeps the room feeling balanced, not cluttered.
- Use your level, every single time. “Close enough” is how you end up with a crooked landscape that makes everyone feel slightly nauseous. If you don’t have a level, download a leveling app on your phone—it’s better than nothing.
- Plan for the furniture. If you’re hanging a picture above a sofa or a sideboard, make sure it’s actually related to the piece below it. Leave about six to ten inches of space between the top of the furniture and the bottom of the frame so they look like a single unit rather than two random objects floating in space.
The Bottom Line
Stop guessing and start measuring; a little extra time with a tape measure saves you from a crooked frame and a hole you’ll have to patch later.
Match your hardware to your wall type—drywall anchors aren’t just suggestions, they’re the difference between a clean display and a broken frame on the floor.
Keep it simple; you don’t need a specialized gadget kit, just a level, the right fasteners, and a steady hand to get the job done right the first time.
Get It on the Wall and Move On
At the end of the day, hanging a picture isn’t about achieving architectural perfection; it’s about getting the job done without making a mess of your drywall. You’ve got your measurements squared away, you’ve picked the right hardware for the weight of the frame, and you’ve got the tools ready to go. Don’t let the fear of a crooked line or a stray nail hole paralyze you. Just remember to measure twice and trust the hardware you chose. Once that level shows the frame is straight, you’re done. No need to over-engineer the process or spend three hours debating an inch of space. Keep it simple, stick to the fundamentals, and let the tools do the heavy lifting.
We spend so much of our lives staring at digital perfection on screens, but real life is lived in the physical spaces we inhabit. A house becomes a home when it reflects the things you actually care about, even if a frame is slightly off-center or a nail isn’t perfectly plumb. My advice? Stop treating your home decor like a high-stakes engineering project and start treating it like what it actually is: a way to make your environment feel human. Get that photo up, hang that art, and go enjoy your space. The goal isn’t a museum; it’s a place where you can actually relax and breathe.
