
I remember standing in my garage three years ago, staring at a perfectly good vintage metal lamp that looked like it had been dragged through a coal mine. I’d spent forty bucks on the “premium” cans, followed every single instruction on the back of the bottle, and ended up with a sticky, orange-peel mess that looked more like a science experiment than a finish. Most people think learning how to spray paint requires a degree in fine arts or a garage full of expensive air compressors, but that’s a lie. The truth is, most of the “pro tips” you see online are just unnecessary complications that add more friction than value.
I’m not here to sell you on some complicated multi-step ritual that takes all weekend. I want to show you how to get a professional, factory-smooth finish using nothing more than a few cans and a bit of common sense. In this guide, I’m breaking down the actual mechanics of the spray—from managing your distance to timing your coats—so you can stop wasting money on ruined projects. We’re going to focus on the functional reality of the job so you can get it done right the first time and get back to your life.
Table of Contents
Guide Overview
Tools & Supplies
- Spray paint can (The primary coloring agent)
- Sandpaper (To smooth surfaces before painting)
- Drop cloth (To protect the surrounding area from overspray)
- Masking tape (To define edges and protect unwanted areas)
- Primer (1 can for surface adhesion)
- Spray paint (1-2 cans depending on surface area)
- Degreaser or soap (Small amount to clean the surface)
Step-by-Step Instructions
- 1. First, you need to prep the surface properly. I’ve seen too many people try to paint over rust, grease, or old flaky paint, and it’s a recipe for a disaster that’ll peel off in a week. Grab some sandpaper—around 220 grit should do—and scuff everything up until it feels uniform. If there’s any oil or grime, wipe it down with a bit of mineral spirits. If you skip this, you’re basically just painting over trash.
- 2. Next, get your masking game on point. Don’t be lazy here; if you don’t want spray paint on your floor or the parts of the object that aren’t supposed to change color, cover them up. Use painter’s tape and some old newspapers or drop cloths. I always say it’s better to spend ten minutes taping things off than ten hours scrubbing overspray out of your carpet.
- 3. Now, hit it with a primer. Think of primer as the connective tissue between your object and the actual color. It gives the paint something to bite into. Don’t go overboard; two light, even coats are plenty. If you try to drown the object in primer, you’ll just end up with a gummy mess that takes forever to dry.
- 4. When it comes to the actual painting, the biggest mistake is trying to do it all in one go. You want to apply multiple thin layers rather than one thick, heavy coat. Hold the can about 8 to 12 inches away and use a steady, sweeping motion. If you find yourself stopping in one spot, you’re going to get a drip, and nobody wants to deal with that.
- 5. Shake that can like your life depends on it. Seriously. Most spray paints have pigments that settle at the bottom, and if you don’t mix them thoroughly, your finish will look patchy and uneven. Give it a good two-minute shake before you start, and keep shaking it occasionally while you work to keep the pressure consistent.
- 6. Once you’ve finished your last light coat, leave it alone. This is the hardest part for most people, but patience is a tool just like any wrench or screwdriver. Let it dry in a dust-free area. If you touch it too early just to see if it’s hard, you’ll leave fingerprints that’ll haunt you every time you look at the finished project.
Mastering Spray Paint Surface Preparation for a Professional Finish
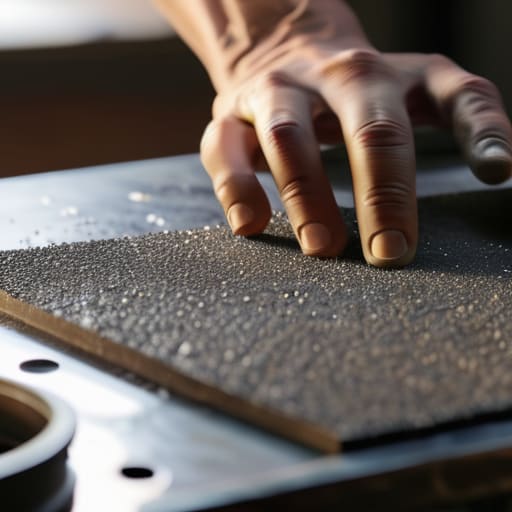
Look, I’ve seen too many people rush straight to the color, only to watch their hard work slide off the surface in a gooey mess. If you want a finish that actually lasts, you can’t skip the grunt work. Most of the failures I see come down to poor spray paint surface preparation. If there’s even a hint of grease, dust, or old wax on that object, the paint isn’t going to bond; it’s just going to sit on top like a film. Grab some degreaser or even just a bit of dish soap and a scrub pad. Get it spotless. Once it’s clean, a quick sand with fine-grit sandpaper is your best friend to give the new coat something to bite into.
Don’t even think about skipping the primer for spray painting either. I know it feels like an extra step that slows you down, but primer is what bridges the gap between your material and your finish. It seals the surface and ensures your colors stay vibrant instead of getting soaked up by the substrate. If you’re working with metal or plastic, a dedicated primer is non-negotiable. It’s the difference between a professional-looking piece and something that looks like a middle school art project.
Choosing the Best Spray Paint for Diy Projects and Primers
Look, don’t walk into the hardware store expecting a miracle in a can. Most people grab the cheapest option on the shelf and then wonder why their project looks like a textured mess after two days. If you want results that actually last, you need to understand that the paint is only as good as the bond it forms. I always tell my clients to look for high-solids formulas; they tend to level out better, which is your best defense for preventing drips and runs when you’re working on vertical surfaces.
If you’re working with metal or plastic, don’t even think about skipping the primer for spray painting. It’s not an extra step to make your life harder; it’s the foundation that keeps the finish from peeling off in sheets six months from now. Also, pay attention to the spray paint drying time listed on the back of the can. I’ve seen too many guys rush the second coat because they’re impatient, only to end up with a gummy, ruined surface. Stick to the manufacturer’s timeline, and you’ll save yourself a massive headache.
Five Hard-Won Lessons to Keep Your Project from Turning into a Disaster
- Check the weather before you even crack the seal. If it’s too humid or about to rain, just walk away. Moisture in the air is the fastest way to end up with a finish that feels like sandpaper or never truly dries.
- Stop trying to cover everything in one go. I see people trying to hide the original color with one heavy coat, and all they get are massive drips. Do three or four thin, light passes instead. It takes a few extra minutes, but it’s the difference between a pro finish and a sticky mess.
- Keep the can moving, always. If you pause your hand for even a second while the nozzle is pressed, you’ve just created a drip that you’ll be trying to sand out for the next three hours. Treat it like a steady, rhythmic motion—start the spray before you hit the object and stop it after you’ve passed it.
- Don’t forget the distance. If you’re too close, you get runs; if you’re too far, you get a dry, grainy texture. Aim for about 8 to 12 inches. It’s a sweet spot you’ll find once you actually start practicing.
- Shake that can longer than you think you need to. Most people give it a quick thirty-second rattle and call it a day. If you want the pigment and the propellant to actually mix properly, give it a solid two minutes of vigorous shaking. If you don’t, you’ll end up with blotchy patches that look amateur.
The Bottom Line
Don’t skip the prep work; a clean, sanded surface is the difference between a finish that lasts and one that peels off in a week.
Less is more—multiple thin, quick coats beat one heavy, gloopy layer every single time.
Work in a space with decent airflow and keep your cans moving to avoid the drips and sags that ruin a good project.
Getting It Over the Finish Line
At the end of the day, spray painting isn’t about magic; it’s about following a logical sequence. If you’ve taken the time to clean your surface, applied a solid primer, and kept your distance while moving those cans in steady, controlled strokes, you’ve already done the heavy lifting. Don’t let the urge to rush lead you into a second coat too early, or you’ll end up fighting drips and runs that take twice as long to fix. Just remember that patience is your best tool in this process. Stick to the system, let the layers dry properly, and you won’t have to deal with the headache of a failed project.
Once that final coat sets and you step back to look at what you’ve done, I hope you feel that same sense of satisfaction I get when I finally get a vintage circuit board humming again. There is something deeply grounding about taking a piece of junk and, through a bit of grit and the right technique, turning it into something functional and beautiful. Stop overthinking the “perfect” technique and just start making things. The world has enough polished, mass-produced clutter; what it needs are more people willing to get their hands dirty and build something that actually lasts.
