
I was halfway through trying to stabilize a vintage Moog synth last weekend when the whole thing shifted three inches to the left because my makeshift table decided it had reached its limit. It’s a frustrating, universal truth: you can’t do precision work on a surface that’s fighting you. Most people think they need a massive, expensive shop setup or a complex set of architectural blueprints to get started, but that’s just more noise. Learning how to build a workbench isn’t about mastering fine woodworking; it’s about creating a stable, dead-level platform that won’t wobble when you’re actually putting it to use.
I’m not here to sell you on a project that takes three months and a second mortgage. I want to show you how to build something solid using standard lumber and basic tools that you probably already have in your garage. We’re going to skip the fluff and focus on the structural essentials—the stuff that actually matters, like joint integrity and weight distribution. By the end of this, you’ll have a functional, heavy-duty station that bridges the gap between your ideas and your finished projects. Let’s get to work.
Table of Contents
Guide Overview
Tools & Supplies
- Circular saw or miter saw for cutting lumber
- Power drill for driving screws
- Tape measure for precise marking
- Speed square for ensuring straight lines
- Level to ensure a flat work surface
- 2×4 lumber (8-10 boards)
- 4×4 lumber (2 posts)
- 3/4 inch plywood (1 sheet)
- Wood screws (1 box of 2.5 inch)
- Wood glue (1 bottle)
Step-by-Step Instructions
- 1. First, stop overthinking the design and get your materials. You don’t need exotic hardwoods or expensive veneers; you need 2x4s and a thick sheet of plywood or MDF for the top. Go to the local lumber yard, grab a stack of construction-grade pine, and make sure you pick the straightest boards you can find. If they’re bowed or twisted, you’ll spend more time fighting the wood than actually working.
- 2. Next, let’s get the frame together. I like to build a simple rectangular box using your 2x4s to create the base. Measure twice, cut once, and use a speed square to ensure every corner is a true 90 degrees. If your frame is crooked now, every project you do on top of it later will feel off-kilter. Use heavy-duty wood screws—not nails—to keep everything rigid.
- 3. Now, it’s time to install the legs. I usually go with four beefy 4×4 posts, but if you’re on a budget, you can sandwich 2x4s together to get the same structural integrity. Bolt these directly into the corners of your frame using carriage bolts. You want this thing to be rock solid; if it wobbles when you’re hammering, it’s useless to me.
- 4. Once the skeleton is standing, it’s time for the tabletop. Lay your plywood or MDF over the frame. I recommend a thickness of at least 3/4 of an inch to prevent sagging. Secure it from underneath using cleats or screws driven from the top, but be careful not to strip the wood. A heavy top is your best friend when you’re trying to keep a workpiece from sliding around.
- 5. Don’t skip the leveling step. Even a concrete garage floor has its quirks. Use a standard bubble level to check the surface, and if one corner is sitting low, shim it up with some scrap wood or even a piece of heavy cardboard. A level surface is the difference between a professional setup and a frustrating mess.
- 6. Finally, add some basic utility without the clutter. Screw a heavy-duty power strip to the side of the frame so you aren’t tripping over extension cords, and maybe add a couple of simple wooden vises if you have the extra scrap. Keep the underside clear for storage, but don’t over-engineer it. The goal is a clean, functional space where you can actually move.
Choosing Heavy Duty Workbench Design Over Flimsy Hacks
Look, I’ve seen enough “quick-fix” projects fall apart under the weight of a single vise to know that cheap is expensive in the long run. Most people fall into the trap of following those flimsy, lightweight woodworking workbench plans they find online that use nothing but thin plywood and some mismatched screws. If you’re planning on doing anything more substantial than folding a piece of paper, you need a heavy duty workbench design that actually respects the laws of physics. You want mass. You want stability. If your table wobbles every time you drive a screw or plane a board, you aren’t working; you’re fighting your furniture.
Instead of chasing some trendy aesthetic, focus on building a foundation that can handle real abuse. When you’re building a sturdy work table, prioritize thick legs and a solid, heavy top that won’t bounce when you strike it. It’s about creating a reliable anchor point for your projects. Once you have that solid base, you can start thinking about garage workshop organization and integrated tool storage, but don’t get ahead of yourself. Build the bones right first, or you’ll be rebuilding them again in six months.
Essential Woodworking Tools for Beginners to Get Moving
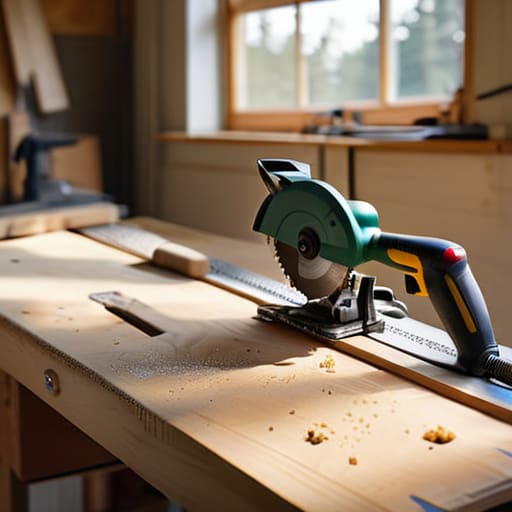
Look, you don’t need a garage full of expensive, specialized machinery to get this project off the ground. When I was first starting out, I thought I needed every gadget in the catalog, but that’s just a fast way to drain your bank account without actually getting anything done. For this build, focus on the essential woodworking tools for beginners that actually move the needle: a reliable circular saw, a cordless drill with a good set of bits, and a decent tape measure. If you can cut a straight line and drive a screw without stripping the head, you’re already halfway there.
Don’t get bogged down in the weeds of complex woodworking workbench plans before you’ve even laid your first piece of lumber. Your goal right now is utility, not perfection. Once the frame is up, you might start thinking about workbench tool storage ideas to keep your workspace from turning into a junk pile, but let’s take it one step at a time. Grab a sturdy level and some clamps—you’ll thank me when you aren’t fighting a wobbly table halfway through the assembly. Keep it simple, keep it functional, and just get to work.
Five Things I Wish I Knew Before I Started Sawing
- Don’t skimp on the legs. I’ve seen too many guys build a beautiful top only to have the whole thing wobble like a jelly mold the second they apply any pressure. Use thick, solid stock—think 4x4s or doubled-up 2x4s—and make sure they are braced properly. A workbench isn’t a dining table; it’s a tool.
- Prioritize a flat surface over a pretty one. You can sand that plywood top until your arms ache, but if the foundation is uneven, nothing you build on top of it will be straight. Check your level constantly, and if you have to, shim it until it’s dead on.
- Think about your height before you drive the first screw. If you build it too low, your back will pay for it by the end of the first weekend. A good rule of thumb is to set the height at your wrist bone when standing straight, but adjust that based on whether you’re doing heavy sawing or fine detail work.
- Build in some clamping points. A workbench without ways to hold your project still is just a glorified table. Whether it’s drilling holes for bench dogs or adding a simple vise, you need a way to keep your hands free and your workpiece stationary.
- Keep the footprint realistic. It’s tempting to build a massive station that covers the whole garage, but you’ll quickly realize you need room to actually move around the piece. Build it big enough to be useful, but small enough that you aren’t tripping over it just to get to your car.
The Bottom Line: Build It Once, Build It Right
Don’t get distracted by fancy, high-tech gadgets or overly complex blueprints; a solid, heavy workbench built from reliable materials will outperform any “smart” hack every single time.
Focus on stability and mass over aesthetics—if your workspace wobbles when you’re working, you aren’t working, you’re just fighting your own furniture.
Invest in a few foundational tools that actually do the job instead of buying a massive kit of mediocre ones; it’s better to have one good saw than ten cheap ones that won’t cut straight.
Get to Work
At the end of the day, building a workbench isn’t about following a perfect architectural blueprint or owning every gadget in the catalog. It’s about choosing a design that won’t wobble when you’re actually applying pressure and getting the right tools to make the job happen. We’ve covered the importance of prioritizing heavy-duty construction over those flimsy, pre-fab kits that fall apart the moment you tighten a bolt. Remember, the goal here is a stable, reliable platform that serves your needs rather than a complicated project that leaves you frustrated and short on time. Keep it simple, keep it sturdy, and focus on functional stability above all else.
Once that last screw is driven home and you wipe the sawdust off the surface, don’t just walk away and let it become a glorified shelf for junk. A workbench is a living part of your workspace; it’s where ideas turn into physical reality. It might not look like a showroom piece, and it certainly won’t be perfect, but it will be yours. Stop overthinking the aesthetics and start using the space you’ve created. The best way to honor the work you just put in is to actually get something built on top of it. Now, quit reading and start building.
