
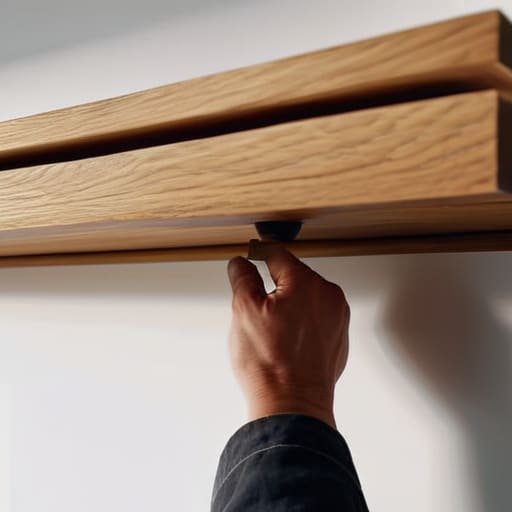
I was staring at a pile of expensive reclaimed oak and a set of crooked brackets last Saturday, wondering why every single online tutorial makes this look like a weekend breeze when it actually feels like a math exam. Most people think you need a specialized workshop and a degree in carpentry to pull off a successful floating shelves diy project, but that’s a load of nonsense. The truth is, most of those “aesthetic” tutorials skip the unglamorous part: the structural reality of what’s actually happening behind your drywall. If you don’t respect the physics of the load, you aren’t building a shelf; you’re just building a future trip to the emergency room when your heavy books decide to take a dive.
I’m not here to sell you on a lifestyle or show you a Pinterest-perfect dream that requires a custom-built jig. I’m going to show you how to do this right using the tools you already have in your garage. We’re going to focus on the only three things that actually matter: finding your studs, choosing the right hardware, and getting it level on the first try. No fluff, no wasted motion—just a straightforward system to get your gear off the floor and onto the wall.
Table of Contents
Guide Overview
Tools & Supplies
- Drill/Driver for mounting brackets and screws
- Level to ensure shelves are straight
- Stud finder to locate wall supports
- Saw for cutting wood to size
- Measuring tape for precise placement
- Wood boards (2-3 pieces depending on length)
- Floating shelf hardware/brackets (1 set per shelf)
- Wood screws (appropriate length for wall studs)
- Sandpaper (medium and fine grit)
- Wood stain or paint (1 small can)
Step-by-Step Instructions
- 1. First, stop browsing Pinterest and go grab your tools. You’re going to need a drill, a level (don’t even think about using a phone app for this), a stud finder, a saw, and some heavy-duty wood screws. If you’re building the shelves from scratch, you’ll also need some decent quality lumber—I usually go for something solid like oak or pine, but avoid that cheap particle board stuff that crumbles under pressure.
- 2. Locate your studs. This is the step where most people fail, and it’s why their shelves end up in a pile on the floor. Use your stud finder to mark exactly where those vertical supports are behind your drywall. If your layout doesn’t line up with the studs, you’ll need to use high-quality toggle bolts, but honestly, if you can anchor directly into the wood, you’re golden.
- 3. Build or buy your mounting bracket. If you’re a DIYer, I recommend building a simple “cleat” system out of 2x2s or buying a heavy-duty steel floating shelf bracket. Whatever you choose, make sure it’s structurally sound. I’ve seen people try to use flimsy hardware that looks great in photos but can’t hold a single hardcover book without bowing.
- 4. Level it out and mark your holes. Hold your bracket up to the wall, place your level on top, and adjust until that bubble is dead center. Once it’s perfectly straight, take a pencil and mark your drilling points. If your lines are off by even a fraction of an inch, the whole shelf is going to look crooked and amateurish, and there’s no fixing that once the holes are drilled.
- 5. Drill and mount the bracket. Drill your pilot holes first to prevent the wood from splitting, then drive your screws in tight. Give the bracket a good, firm tug to make sure it isn’t moving an inch. If it feels loose, stop everything and re-evaluate your anchors before you move on to the actual shelf.
- 6. Slide the shelf on and secure it. Slide your wooden shelf over the bracket or cleat. To prevent the shelf from sliding off the bracket later, I always drive a couple of small finish screws through the top of the shelf into the bracket itself. It’s a tiny detail, but it’s the difference between a shelf that stays put and one that creeps forward every time you touch it.
- 7. Clean up and load up. Wipe away the drywall dust, check your level one last time, and start adding your gear. Don’t go overboard immediately; start with your heavier items to ensure the system is holding the weight as expected. Once you’ve verified it’s stable, you can decorate with confidence.
The Essential Woodworking Tools for Shelving Success
Look, you don’t need a shop full of industrial machinery to pull this off, but you can’t wing it with a dull screwdriver and a prayer. If you want a clean, modern floating shelf design, your precision is only as good as your gear. I always tell my clients: invest in a decent cordless drill and a high-quality level. If that level is cheap and won’t hold its calibration, your “floating” shelf is going to look like it’s sliding off the wall, and nothing ruins a room faster than a crooked line.
When it comes to the actual assembly, don’t overlook the importance of choosing the right woodworking tools for shelving to handle the finish. A random sponge will leave your grain looking blotchy and amateur. If you’re planning on staining wood shelves, get a high-density foam applicator or a clean rag. It’s a small detail, but it’s the difference between a shelf that looks like a DIY project and one that looks like custom furniture. Finally, make sure you have a solid stud finder; relying on drywall anchors alone is a recipe for a midnight trip to the hardware store when your decor hits the floor.
Mastering Hidden Shelf Brackets for a Clean Look
If you want that high-end, minimalist look, you have to commit to hidden shelf brackets. Nothing kills the aesthetic of a modern floating shelf design faster than seeing a chunky L-bracket peeking out from underneath. Most people make the mistake of thinking they can just slap these onto any surface, but if you’re mounting shelves to drywall without hitting a stud, you’re asking for a disaster. I’ve seen too many people try to skip the heavy lifting only to watch their decor end up in a heap on the floor.
My rule of thumb is simple: if you aren’t hitting a solid wood stud, you need to use heavy-duty toggle bolts or specialized anchors. Don’t just rely on the cheap plastic ones that come in the box. You also need to account for shelf weight capacity tips—calculate the weight of the wood itself plus whatever you’re planning to display before you drill a single hole. If you’re using heavy hardwoods, your bracket system needs to be just as beefy. Take the extra ten minutes to level it perfectly the first time; it saves you hours of frustration later.
Five Ways to Keep Your Shelves from Becoming a Liability
- Stop guessing with your stud finder. If you aren’t hitting a solid wood stud, don’t even bother trying to hang a heavy shelf; get some high-quality toggle bolts or heavy-duty anchors, or just move the shelf.
- Don’t skip the level. I’ve seen too many “minimalist” setups ruined by a shelf that slants just enough to make your books slide off like a slow-motion disaster. Use a real level, not a phone app.
- Account for the weight of what you’re actually putting on them. A shelf meant for a single succulent is a completely different beast than one meant for a collection of heavy hardcover cookbooks. Plan for the load, not the aesthetic.
- Sanding isn’t optional. If you want that professional, seamless look, you need to sand those edges until they’re smooth to the touch. Nothing kills a clean design faster than a splintery piece of wood that catches your sleeve.
- Mind the wall surface. If you’re mounting into drywall, make sure you aren’t putting more stress on the plaster than it can handle. If the wall feels flimsy, your shelving project is going to end with a hole in the wall and a pile of debris on the floor.
The Bottom Line: Don't Overthink It
Prioritize the hardware over the aesthetics; a shelf that looks great but sags under a single book is just expensive clutter.
Measure twice, drill once, and always use a level—your eyes will lie to you, but the bubble won’t.
Keep your tool kit lean; you don’t need a workshop full of specialized gadgets, just the right anchors and a solid drill to get the job done right.
Getting It Done
At the end of the day, building floating shelves isn’t about having a workshop full of expensive, specialized machinery. It’s about getting the fundamentals right: choosing the right wood, picking heavy-duty anchors that won’t fail when you actually put books on them, and ensuring your level is dead on before you drive that last screw. We’ve covered the tools, the hardware, and the trick to hiding those brackets so the whole thing looks like it’s part of the wall rather than just stuck onto it. If you followed the steps and didn’t cut corners on the structural support, you’ve built something that is going to last for decades instead of something that ends up in a landfill in six months.
My advice? Don’t let the fear of making a single wrong hole in your drywall keep you from starting. You can patch a hole, but you can’t easily fix a lack of confidence. Once these shelves are up and holding your gear, you’ll realize that the “complexity” everyone talks about is mostly just noise. There is a specific kind of satisfaction that comes from looking at a clean, organized space and knowing you were the one who engineered it into existence. Stop overthinking the aesthetics and just get your hands dirty. You’ve got the plan; now go build it.
